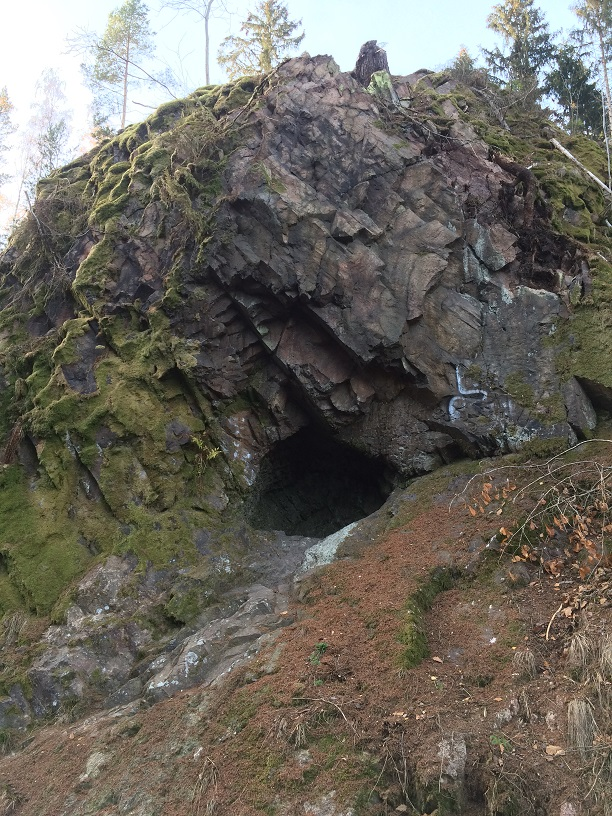
Cave exploration is an awesome hobby, but it can be tough to find new caves to explore in Europe. All information seems to be very segregated, information on each cave can often be only found in the country’s national language, making research a lot harder and in some cases not viable. Searching on social networks can be hard to accomplish as well, facebook group search sucks, and Instagram is even worse, especially with stories disappearing in just 24 hours. TikTok might be a bit better, but most of the information there will be about mainstream, popular caves that are very touristy and you need to buy a ticket to go there. Not the type of exploration we are after. There are some paid maps of caves online, but most of them only have popular caves marked, or just use the method that I will describe to find them, and then they package everything up and sell it to you for 29.99€. Regarding free resources, there are not a lot of blogs left that would share such information in an easily searchable way. So what are your options? I will do a step-by-step tutorial on how to find caves to explore in Europe(and everywhere else) using free and open-source tools that are very easy to use once you know how they work. None of the tools require registration. Let’s start!
Step 1 :
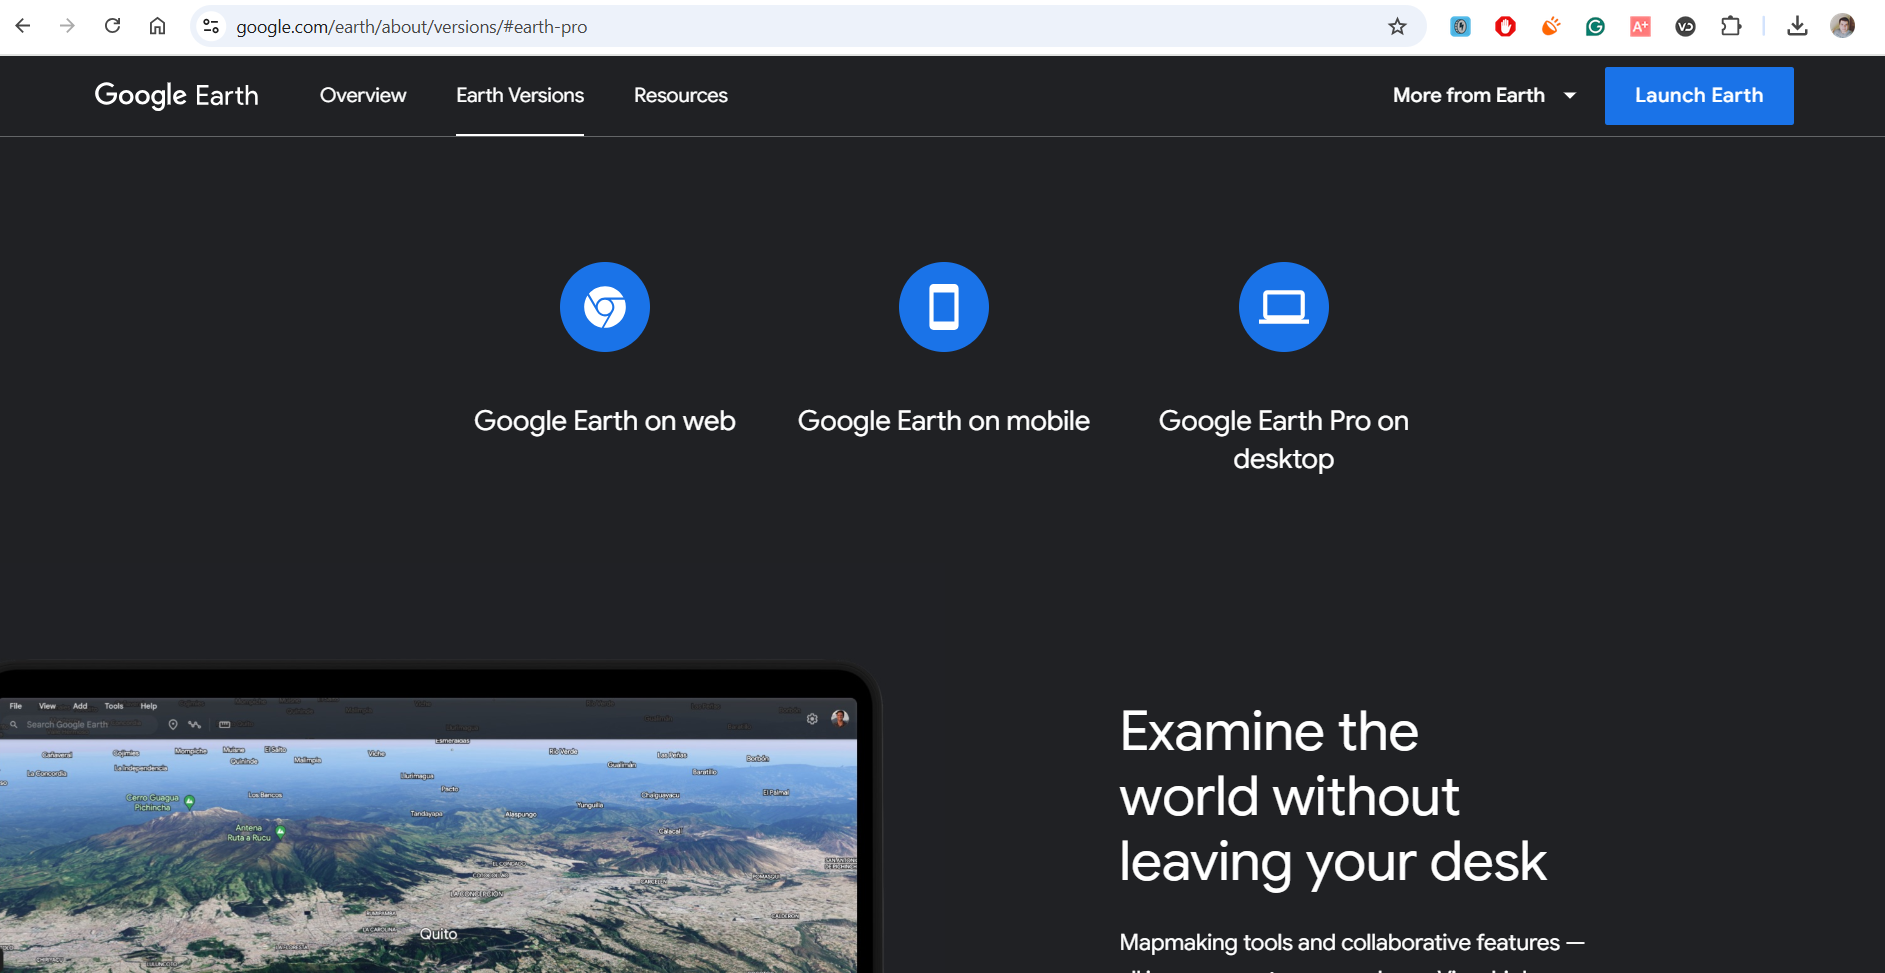
Download and install Google Earth Pro on desktop (https://www.google.com/earth/about/versions/#earth-pro) . This will only work with the desktop version, the online version, and mobile app version won’t work for this method. The installation process is very simple and fast. Once Google Earth Pro is installed, you can open it and see if it works. This is the only piece of software you need to download, all other tools work in the browser.
Step 2:
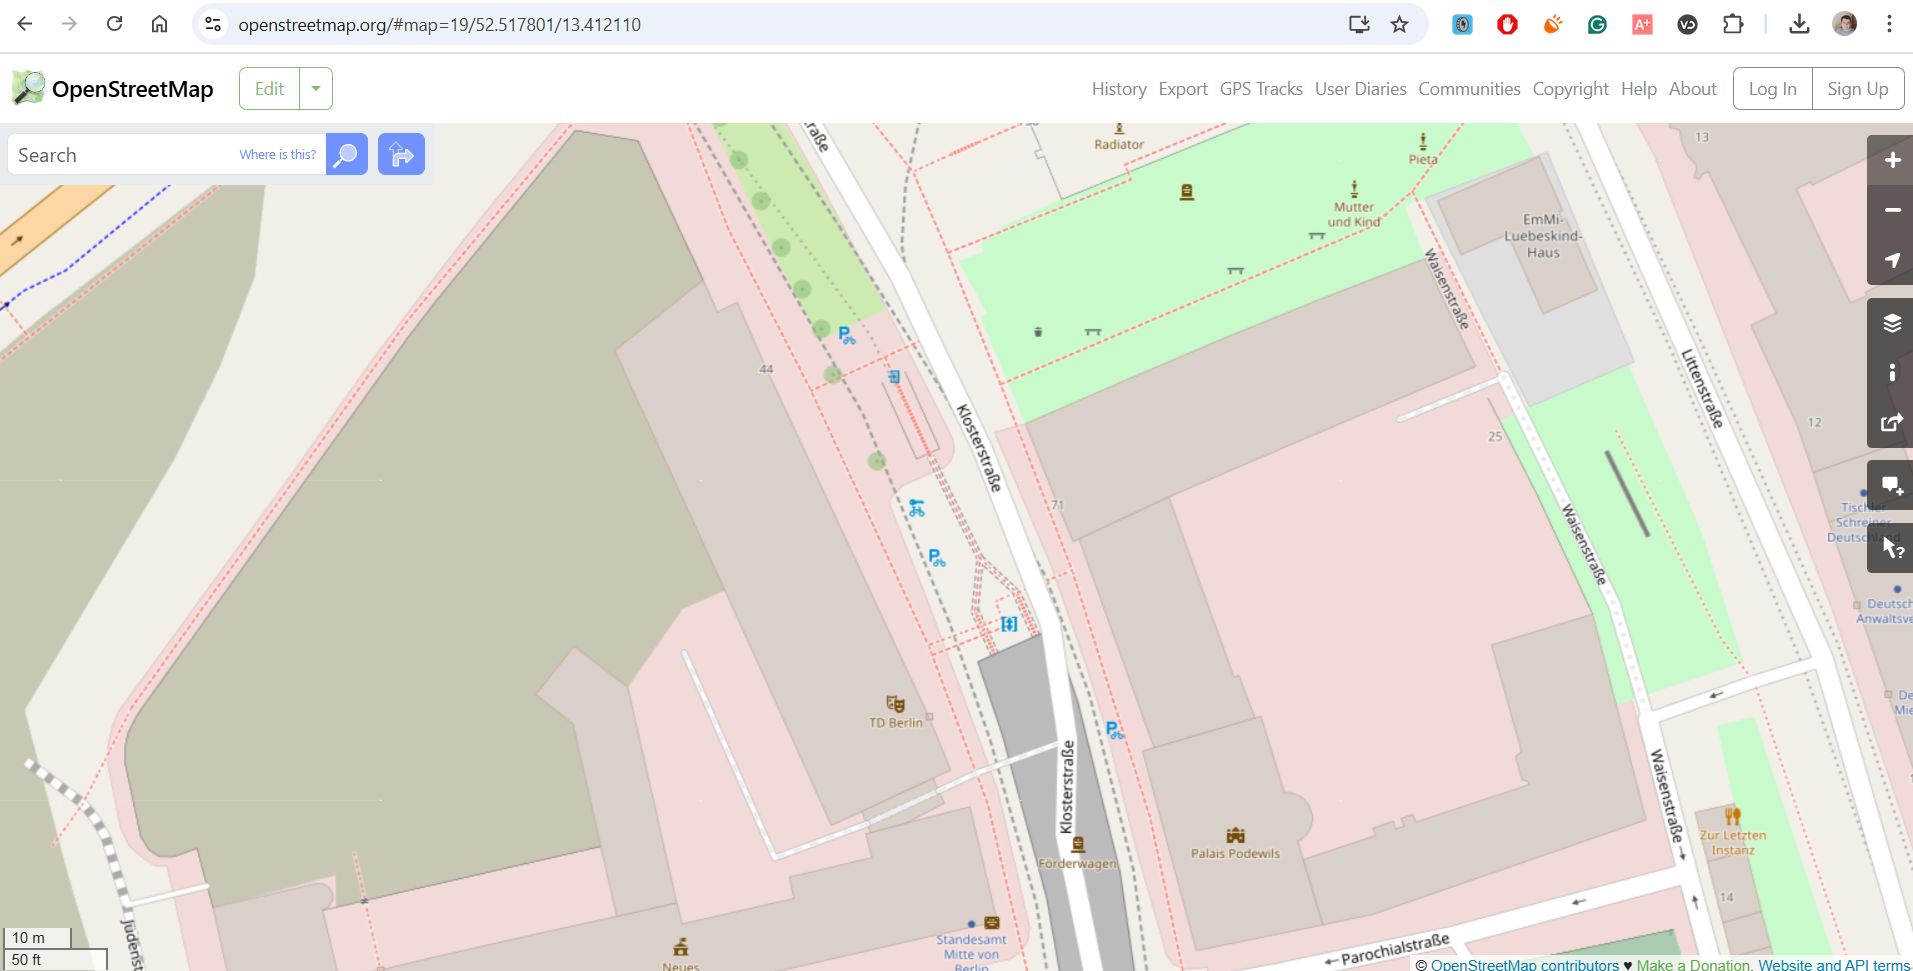
Step 2 is an educational one. To find the objects we are looking for(caves to explore) we need to have some sort of database – a map to look in. This is where one of the coolest projects online comes to save us. It is an open-source map called OpenStreetMap or OSM for short, it was started back in 2004. This is kinda a Wikipedia for maps and geography. Unlike Google Maps or Bing Maps, OSM is made by regular people like you and me, anyone can add, remove, and make changes to objects in the map. Yes, Google Maps is awesome, but have you noticed that it is only good for mainly finding businesses, touristy places, and major landmarks? You can’t just go in there and find a small random cave that only locals know about. This is where OSM comes in, people like to share, and they share a lot more info than Google has access to. You can even find benches on OSM, you can find individual parking spots, springs, trash cans, etc. If you like exploring and traveling, OSM is a must-have tool. It is simply the best option around. Even if you look online for a specific map – let’s say free water fountains map, almost all of them simply take the data from OSM as it is free, and display that info with ads on their website. OSM being an open source tool, means that you should support it if you use it, that will ensure it is sustainable and gets even better in the future. You can either donate money to them, or even better, look up your area on the OSM website, and see if there are any places not yet on the map. Maybe there is a new building in your street, or some parking spots aren’t marked. This will help us all, no matter how small of add addition you think it is. This is very important.
Step 3:
All objects in OSM have tags, think about them like categories. We will use them to filter out the caves. There are thousands of different tags used, so in order for us to know what tags are used for the objects we are looking for, we will use another free website: tagfinder.osm.ch.
This website is a search engine that you can use to find all the potential tags to use. In our case, enter “cave” and see the results. In the results, you will see both the tag, description, and statistics – how many objects with this tag there are on the map overall. In this case, we need to copy “natural=cave_entrance” as this perfectly fits what we are looking for, a cave big enough for humans to enter.
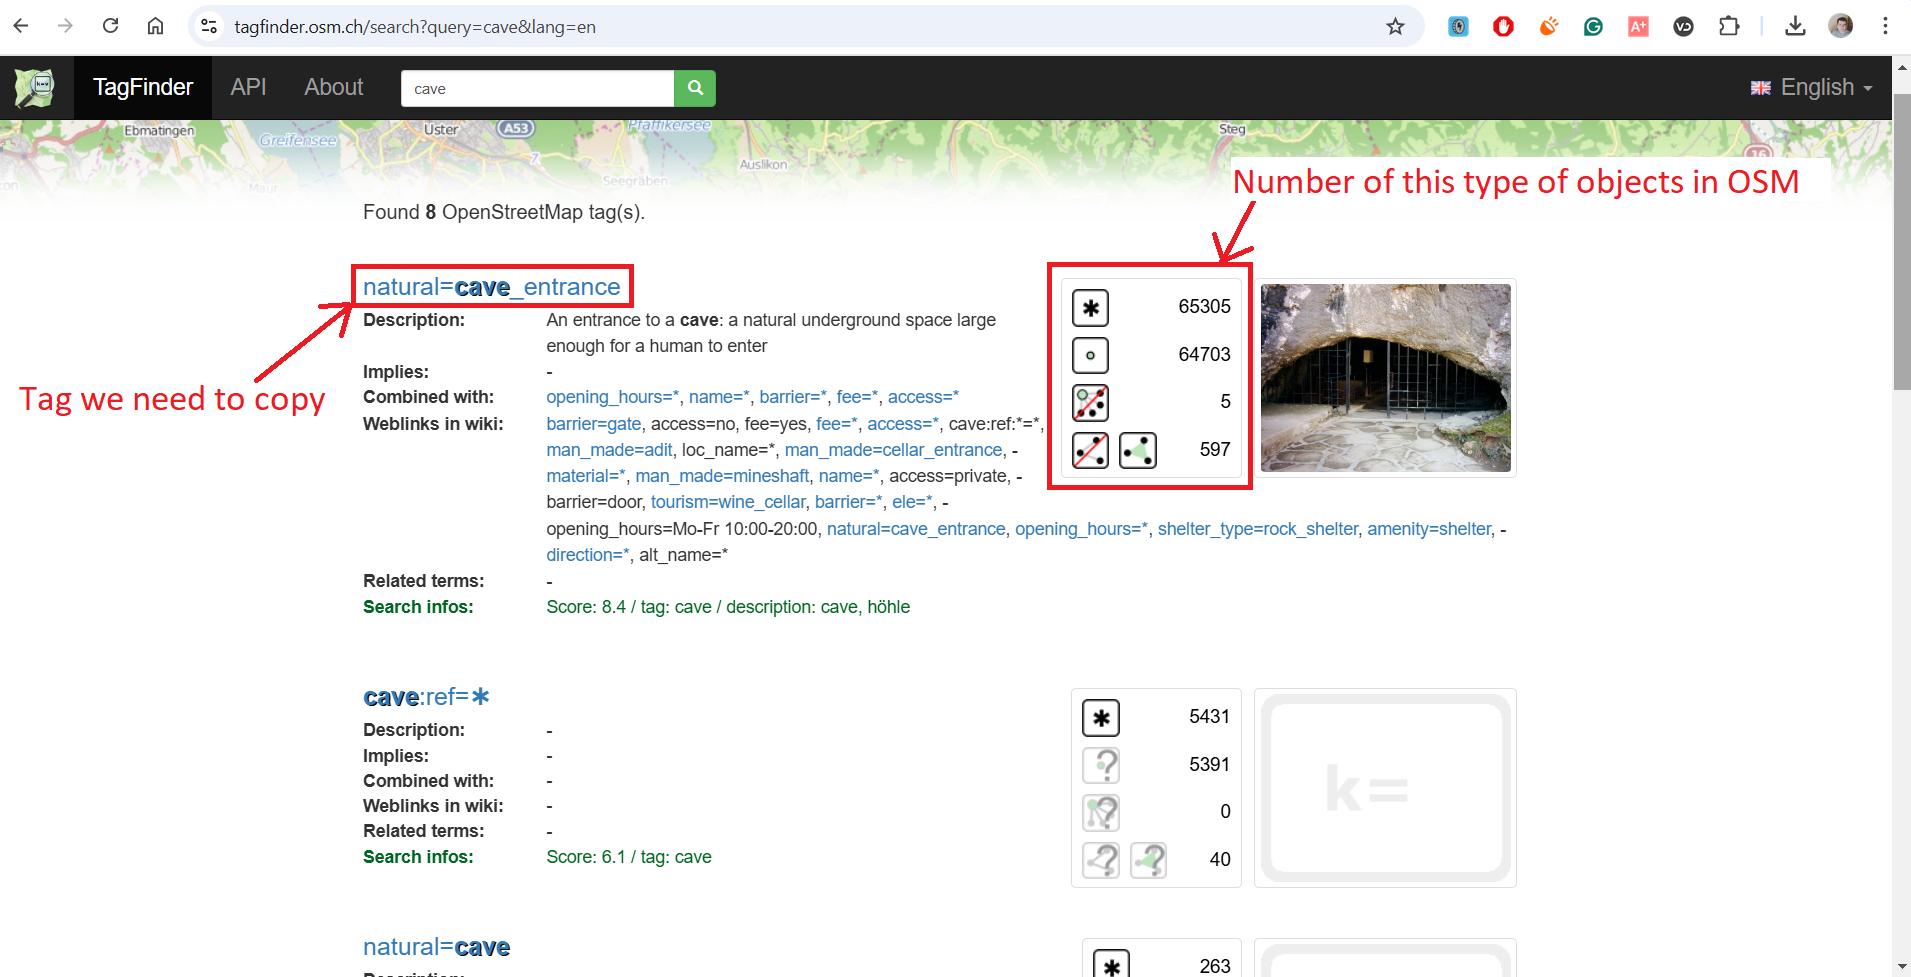
Note: If you are looking for something else and are not sure what it is called you can start with a wider keyword like “natural” If you are looking for natural objects, or “building” if you are looking for buildings(abandoned buildings for example). Then just scroll through the results till you see something that you are looking for. In some cases there might be multiple tags that describe the object you are looking for, in that case, you can use them all to get the best results.
Step 4:
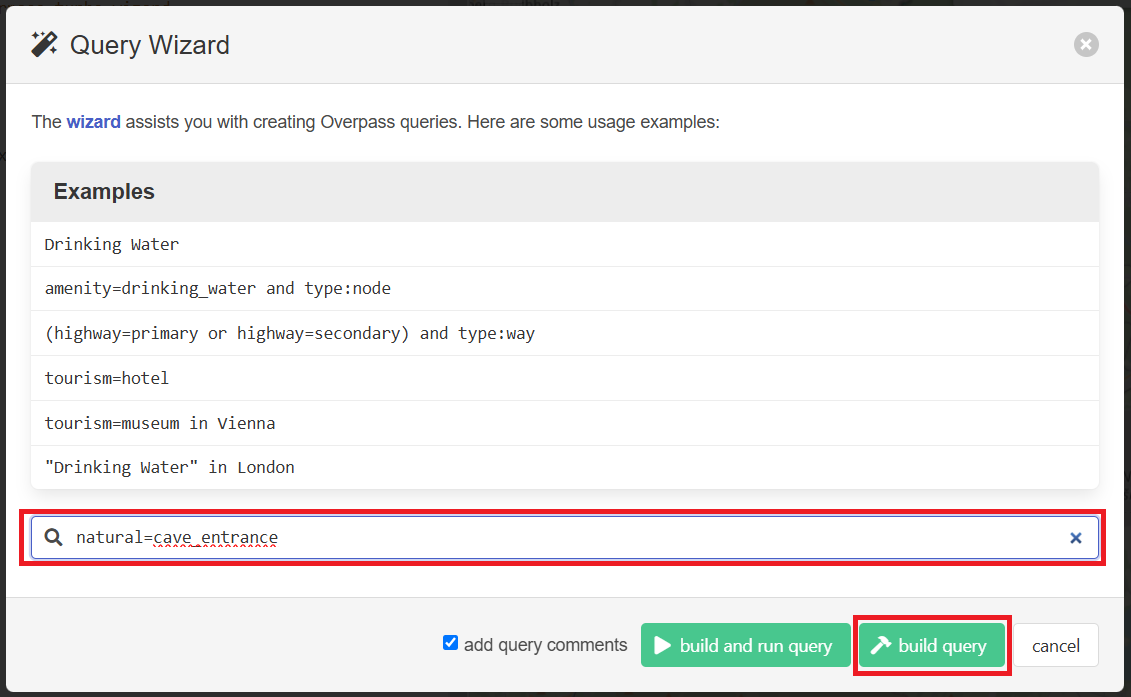
OSM itself is more of a database, looking up stuff on there is very hard and in some cases not doable at all. That is why we will need to use a free tool called overpass-turbo.eu . The main purpose of this tool is to filter all the objects in the OSM and only show us the ones that have the tag that we want, in this case – caves to explore. We have copied the tag from the tagfinder website(natural=cave_entrance) in the last step. Open overpass-turbo.eu and click on the wizard button.

Once the wizard opens paste the tag from the last step and click the “Build query” button.
Note: If you are looking for another type of object and want to use multiple tags simply add the word “or” in between each tag. For example: “tourism=museum or tourism=hotel”.
Step 5:
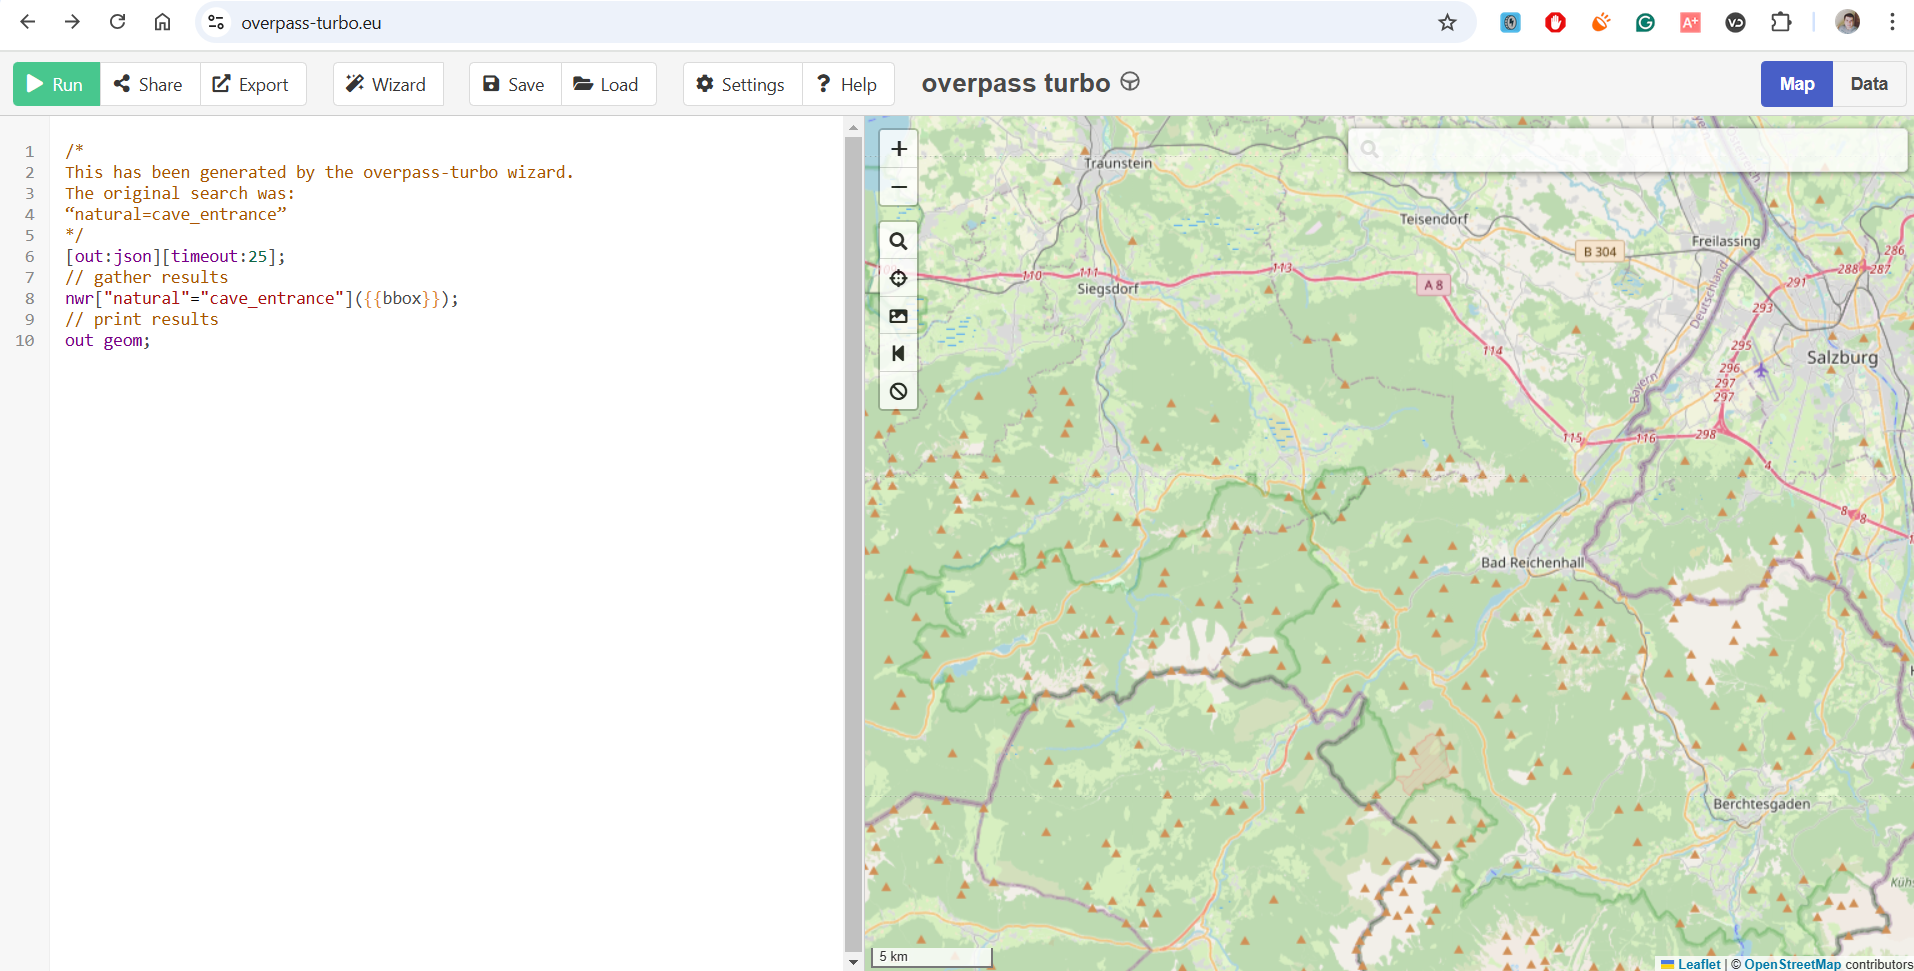
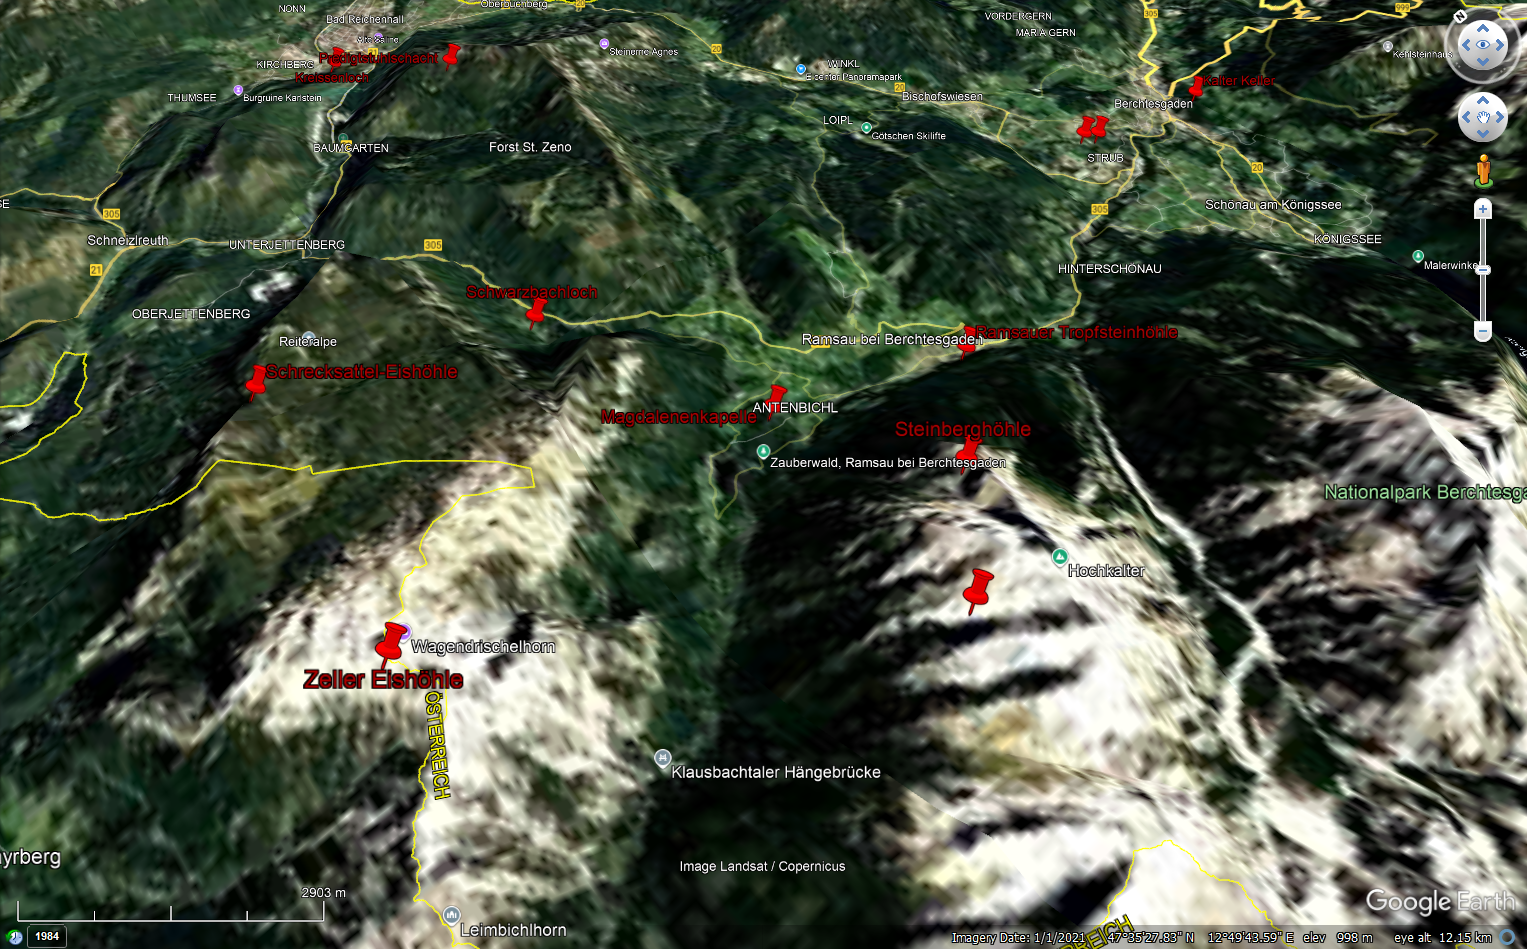
Now that everything is ready for our search we need to specify in which area to look for the caves to explore. You do that by simply positioning the map on the right side of the screen, in my case I will choose the German-Austrian border area to the west of Salzburg. If you are looking for relatively common objects, don’t zoom out too much, the search will take too long or you will get an error message, it can only display a certain number of found objects at once.
Note: Overpass-turbo works with code, we don’t need to write it ourselves because we used the wizard that did that for us, but if you want to do advanced things and search for even more specific stuff, you will need to know how to write some basic code. You can try using ChatGPT or other AI tools to do that, from my experience it works around 50% of the time.
Step 6:
The tags are entered, and the map area is selected. All you need to do now is click the “Run” button at the top left corner. After the map loads, you will see all the caves marked on the map.

When you click on the markers on the map, a small window with extra info will pop out, the amount of info on the cave or other object will depend on the person that has added it to the map, sometimes there is no extra information apart the object type and coordinates, while in other cases you can get tons of extra useful information like elevation, name, how hard it is to get there, etc.
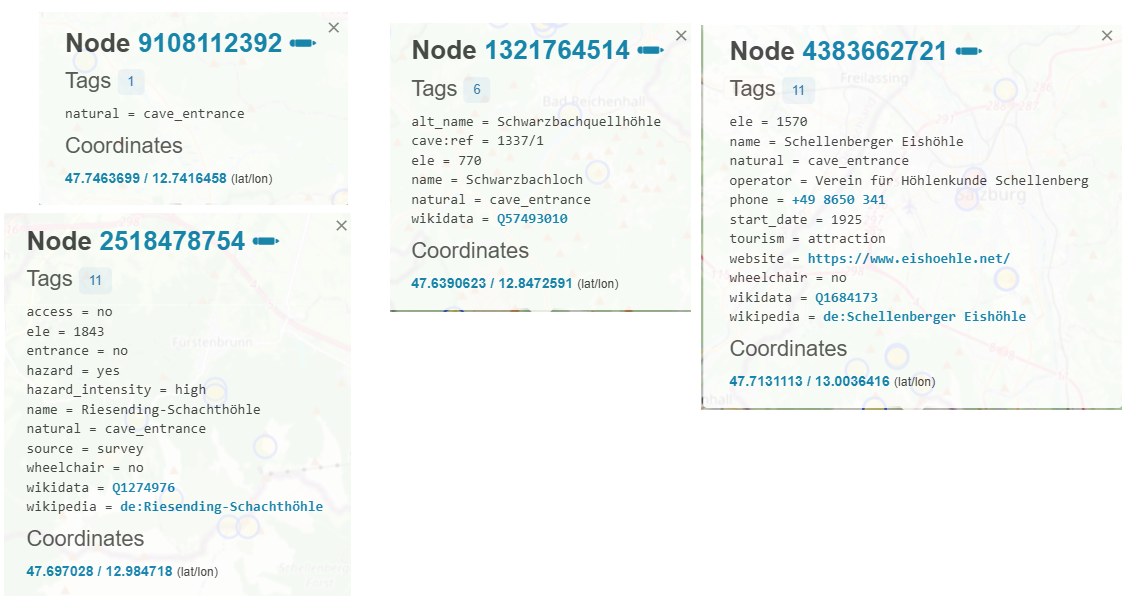
Note: the windows with extra information will have other tags, for example, “ele = 1000″(elevation that the cave is in(meters)). You can use it to further filter your results using overpass-turbo, but be careful, as it will only show you the objects that have that tag added. In the case of caves or other objects that are niche, the amount of information added is usually pretty limited, and further filtering would result in very few caves showing up at all.
Step 7:
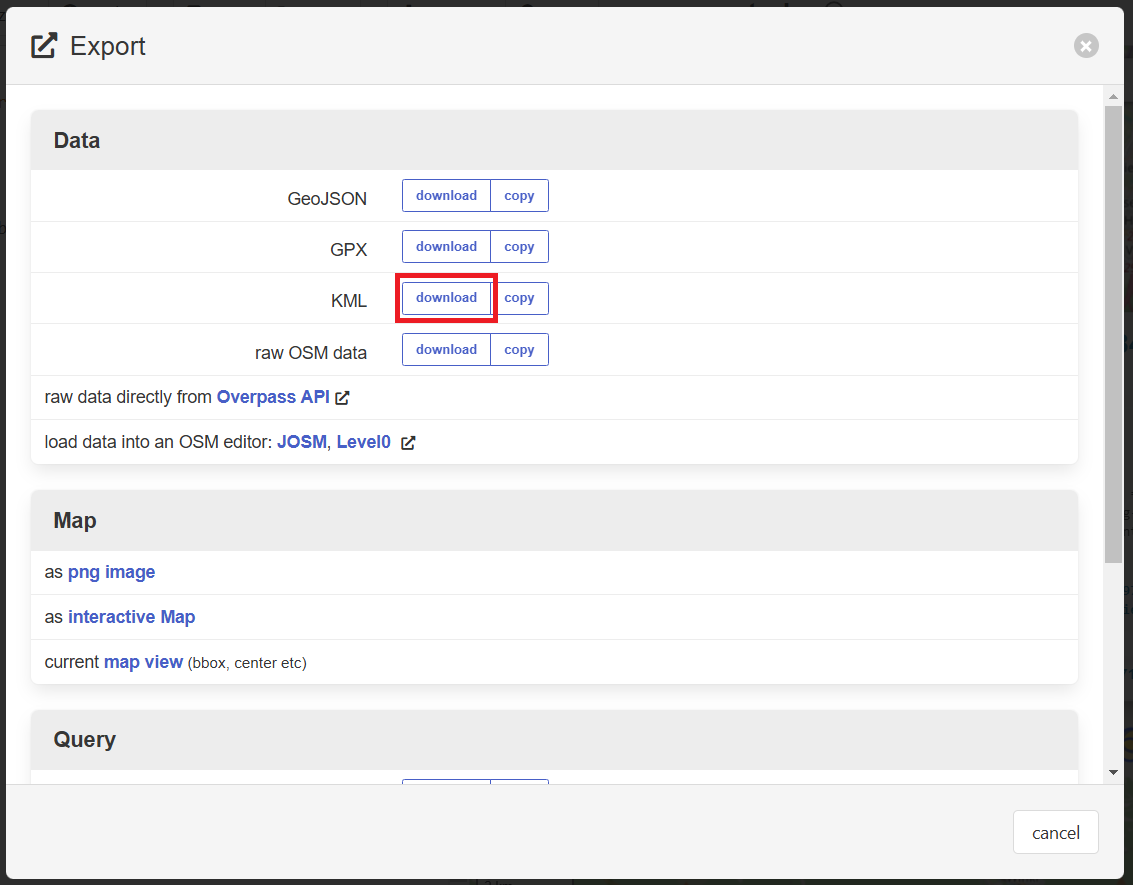
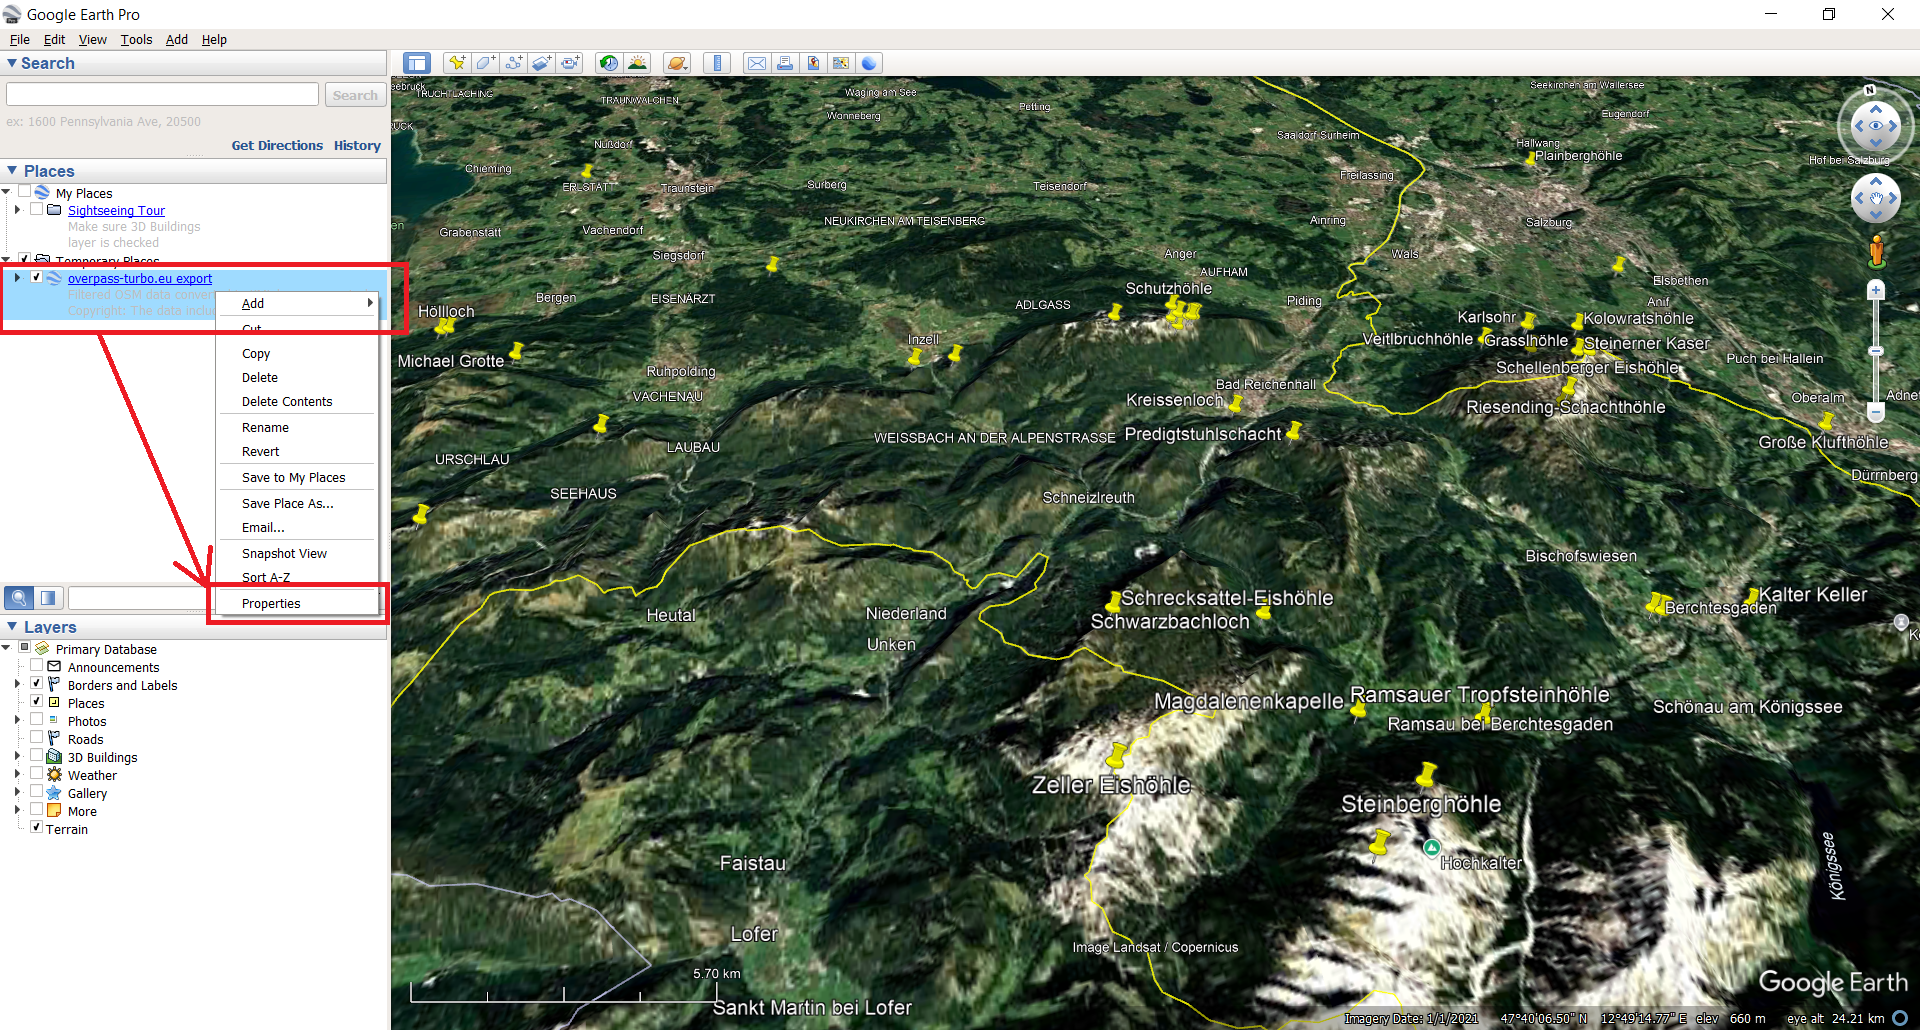
You can simply view the results in Overpass-turbo, or copy the coordinates and use them in any other navigation or mapping tool. But the easier and my favorite way to explore the results and potentially find extra information on them is to use “Google Earth Pro” which we have installed in step 1. You won’t need to add all the points manually. Simply go to Overpass-turbo and click the “Export” button at the top and select the KML download option.
Once the download is completed, open “Google Earth Pro”, go to the “File” menu, and then select the “Open” option, browse to the file you have just saved, and open it. Now you will be able to much more easily explore all the found objects on the map, you will be able to see the terrain, if there are any street views available nearby, or even find extra information, as they sometimes are marked on Google Earth as well and have reviews or photos.
Note: in some cases, once you open a KML file in Google Earth the markers will be so small they are not visible. In this case, right-click on the “Overpass-turbo.eu export” option in the “Places” menu on the right and select “Properties”
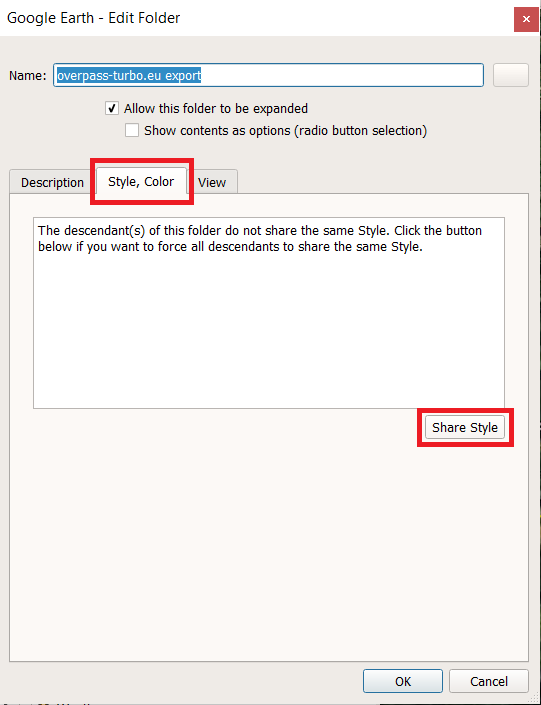
Then in the new window go to “Style, Color” tab and click on the “Share Style” button.
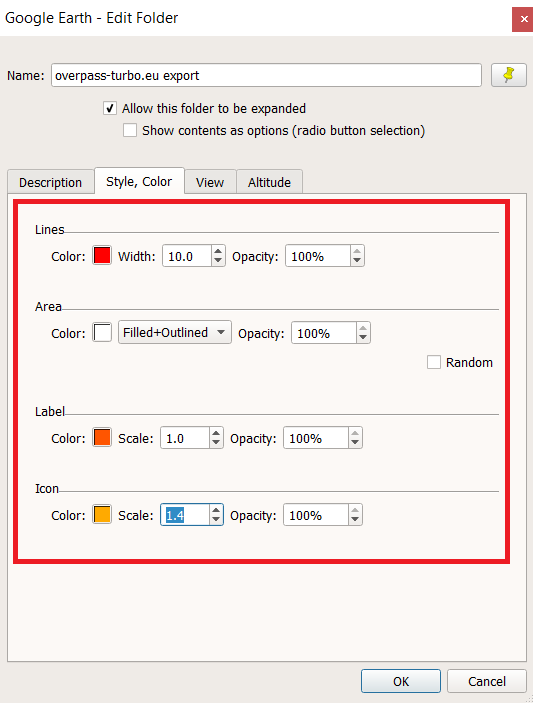
A menu should show up with color and size options for markers, labels(text), and other types of markers that are used for buildings, roads, etc. Just play around with the color and size till you see all the objects and click “Ok”.
Step 8:
Explore and enjoy what you find. These are great tools that once you learn to use, are super versatile and easy to use to find all sorts of cool stuff that you have never even thought about. But don’t forget that all of this is thanks to ordinary people adding stuff to the OSM map. This is all about community, not a huge corporation. So if you ever have free time and know any cool things to add to the map – definitely do that. We help each other out, so we can explore our world and enjoy our hobbies more easily and safely. Look up YouTube to find tutorials on how to add stuff to OpenStreetMap.
If you have any questions, feel free to leave a comment and I will do my best to reply as soon as I can.
Thank you